To create an order, click the New Order button above the Orders grid in the Inventory Module. Here is an overview of the process:
| 1. | Open - the default Status when an order is created. Each item to be ordered should have a line item entry in the grid in the lower section. To add items to the order: |
| • | Click the New Line Item button above the grid. A new row will be displayed. |
| • | Either select from the drop-down menu or type an Item Number or Description. |
| • | Update the Qty Ordered if needed. Line #, Pkg Qty, Cost, and Extension are filled automatically. |
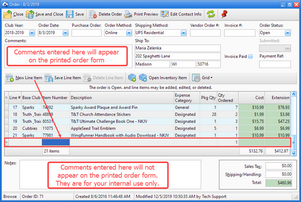
| 2. | Submitted - use when the order has been placed as desired with Awana (via internet, phone, e-mail, etc.). |
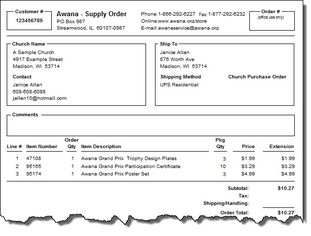
Here is an example of a printed Order form:
| 3. | Received - use when the order arrives. The Rcvd, Qty Rcvd and Qty B/O columns show in the grid. As the Rcvd box is marked, the Qty Rcvd defaults to the total Qty Ordered and Qty B/O defaults to zero. Update these values as needed to reflect the correct quantities received. |
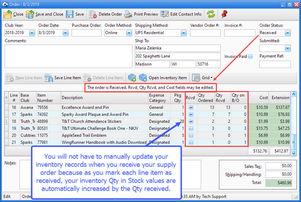
| 4. | Closed - use after the invoice paid check box is marked and the corresponding Paid Invoice # is entered. |

