The Reports Module provides a variety of formal reports. The report options vary slightly, but the steps to generate them are the same. This chapter provides basic instructions. Experiment with options to find the most helpful results.
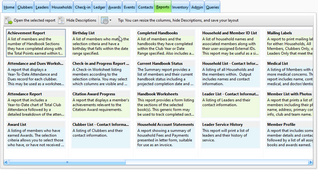
The main Reports page displays each report title (in alphabetical order) with a detailed descriptions.

|
If the descriptions are not needed, click the Hide Descriptions button. The size of the columns can also be adjusted. Use the Grid menu to Save the Current Grid Layout.
|
| 1. | Click Open the Selected Report on the toolbar or double click a report to open the Report Dialog. |

|
The Report Dialog along with examples of each generated report are shown in the following sections. Each report type has different options applicable for running that report. The selected options are saved when the dialog closes and reloaded the next time it is opened.
|
| 2. | Set the Selection Criteria - options for what groups to include in the report. This varies by report, but many include: Club Name, Team Name, Member Type, and Member Status. For some reports, the selection criteria includes a Date Range. |
| 3. | Select Grouping and/or Sorting Options - many reports provide radio buttons on the right to indicate how results should be grouped and/or sorted. |
| 4. | Choose Additional Options - some reports have additional unique options. For example, several reports allow for shaded rows, and provide a color selection option for selecting the shading color. |
| 5. | Click Preview - displays the report results to ensure that the desired dataset is generated. |
|
The Preview and Print buttons are disabled until necessary options are chosen.
|
| 6. | Click Print - opens a Print dialog with options to Print or Export. |
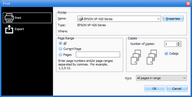
| • | Select which printer to use, which pages to print and the number of copies. |
| • | When the Printer settings are complete, click OK. |
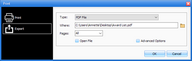
| • | Select the file type, location to save the file, and which pages to print. |
| • | Click OK to export the data. |

